With WDS installed and configured, you will find the actual use of WDS is very straight forward.Here we will cover several tasks associated with the use of WDS
including:
Creating a Capture image
Creating a Custom Install image
Creating a Discover image
Preparing Media for a Discover image
Deploying an Install image
Leveraging the Windows Deployment Services API
1. Creating a Capture image
To create your own Install image, it is first
necessary to create a Capture image. A Capture image is one that you
boot to in order to capture the operating system to a .WIM file.
Right-click one of the boot images you have added to WDS and click Create Capture Boot Image. Choose one that matches the architecture for which you want to target with this Capture image.
In
the initial form presented by the Create Capture Image wizard, you can
enter an Image Name and Image description to identify the capture image.
You must also specify a Location and filename where the new file should
be generated. A progress bar is provided as the capture image is
generated.
When complete, click the Finish button to close this wizard.
Add this newly generated image to the Boot Images in WDS. Right-click Boot Images and choose Add Boot Image.
Browse to the File Location specified in Step 2 to select the new Capture image. When selected, click Next to continue. You are presented the opportunity to update the name and description you entered in Step 2.
Click Next. The Add Image wizard provides a summary of the image to be added based on your selections.
Click Next. Progress is given as the image is added.
When the image has been added to the server, click the Finish button to complete the process.
With the Capture image created, the next steps
are to establish a reference computer to capture an Install image as a
WIM file for deployment.
2. Creating a Custom Install image
Prepare a reference computer and then create an
Install image based on that system. The following steps take you through
the creation of a Custom Install image for Windows Vista:
Create a reference computer.
This includes Windows Vista, Service Pack 1, and any updates or
applications you may want to deploy as part of your Custom Install
image.
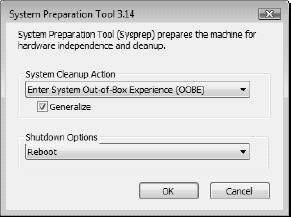
You need to generalize the installation by using Sysprep so that it may be deployed to other systems. Run Sysprep from
\Windows\System32\Sysprep\sysprep.exe
(the folder is hidden by default).
Leave the System Cleanup Action set to OOBE, select the Generalize check
box, and leave Reboot as the Shutdown Option, as shown in
Figure 1.
When the computer restarts, boot to the network and press the F12 key when prompted.
Depending on your hardware, you may need to edit the boot order of the
system or hit a key to be presented with a boot choice menu. Because
there is more than one boot image active in WDS, you'll be presented
with the option to choose a Capture image.
NOTE
When working with Microsoft Virtual PC
2007, you must make sure the focus is set to the boot window for the
virtual machine, then hold down the DEL key during the startup process
to enter the BIOS Setup Utility. From here, you can go to the boot menu
and change the Boot Priority to move PXE to the top of the list.
Choose your Capture image from the list, as shown in
Figure 2 After you have made your choice, the Windows PE image will be loaded over the network using PXE, as shown in Figure 3. When the image finishes loading, the Windows Deployment Services Image Capture Wizard will appear.


Click Next on the Welcome screen to begin.
On
the Image Capture Source screen, choose the appropriate volume to be
captured from the Volume to Capture drop-down list. Enter an Image Name
and Image Description in the fields provided and click Next to continue.
Click the browse button and select the location and filename for where you want to store the image.
The location you specify here must be a local location on the computer
(this is enforced to avoid image corruption in the event that there
could be network issues during the capture process). Be sure to specify a
filename with a .WIM extension.
Select the Upload image to WDS server box and specify the Server Name in the provided field. Once entered, click the Connect
button (depending upon your environment, you may be prompted to provide
credentials with sufficient privilege to connect to the WDS server).
In
the Image Group drop-down box, choose the image group in which you want
to keep this image. Finally, click the Finish button to begin the
process.
NOTE
On Windows Server 2003 systems, two files
are generated during the image creation process: an ImageName.WIM file
and a Res.RWM file. The Res.RWM file contains the file streams that are
associated with the images (each image group will have its own Res.rwm
file).
Because the actual files that make up the image
are stored in this Res.RWM file, the ImageName. WIM file is much
smaller and contains only metadata, which describes the files, folders,
and permissions that make up the image.
The reason for this separation is to
differentiate the resource-only .WIM file from the metadata in order to
speed up the image enumeration process. Image enumeration works only on
.WIM files, and so the Res.rwm file is not used. The data in the Res.rwm
file and in the Image_name. wim file is single-instanced and
compressed.
3. Creating a Discover image
A Discover image
is used to deploy to systems where PXE is not available. Discover
images are saved and booted to physical media such as CDs, DVDs, or USB
drives. The Discover image locates the WDS server and then the server
installs the image to that computer. If you have more than one WDS
server, you can create Discover images to target specific ones. To
create a Discover image, follow these steps:
Right-click
one of the boot images you have added to WDS and click Create Discover
Boot Image. Choose one that matches the architecture for which you want
to target with this Capture image.
Enter the desired Image name and Image description in the fields provided on the Create Discover Image Wizard page.
Specify the location and filename for the Discover image.
You can choose any location, but ultimately this is to be placed on
some kind of removable media that can be inserted into computers you
want to image with WDS (normally those systems that do not support PXE).
Click the Browse button to select the Windows Deployment Server to Respond. This brings up the standard computer selection dialog where you may enter the name of the WDS server.
Click
the Check Names button to verify you have it correctly specified. When
you have the server name properly selected, click OK to close the Select
Computer dialog box. Then, click Next to continue. A progress dialog appears while the discover image is generated and saved to the specified location.
When complete, click the Finish button to close the wizard.